Appearance
Quick start
A working specflow install with one full Epic → Wave → Slice cycle, in under 5 minutes. Copy each block in order. Lines starting with # → are the expected output you should see — verify before moving on.
1. Install
bash
npm install --save-dev @dkolosovsky/specflow
npx specflow init
# → Creates backlog/ + backlog/templates/{epic,milestone,wave,slice}.md
TIP
Cloning the repo instead of installing? See Installation for the contributor path.
2. Create your first epic
bash
npx specflow create epic "Onboarding"
# → Created E001: Onboarding
3. Create a milestone, a wave, and a slice
bash
npx specflow create milestone E001 "First milestone"
npx specflow create wave E001/M001 "First wave"
npx specflow create slice E001/M001/W001 "First slice"
Each create writes a Markdown file from the template and (by default) auto-commits it. Open the kanban (npm run dev, then localhost:5173) to see the wave land in the leftmost draft column:
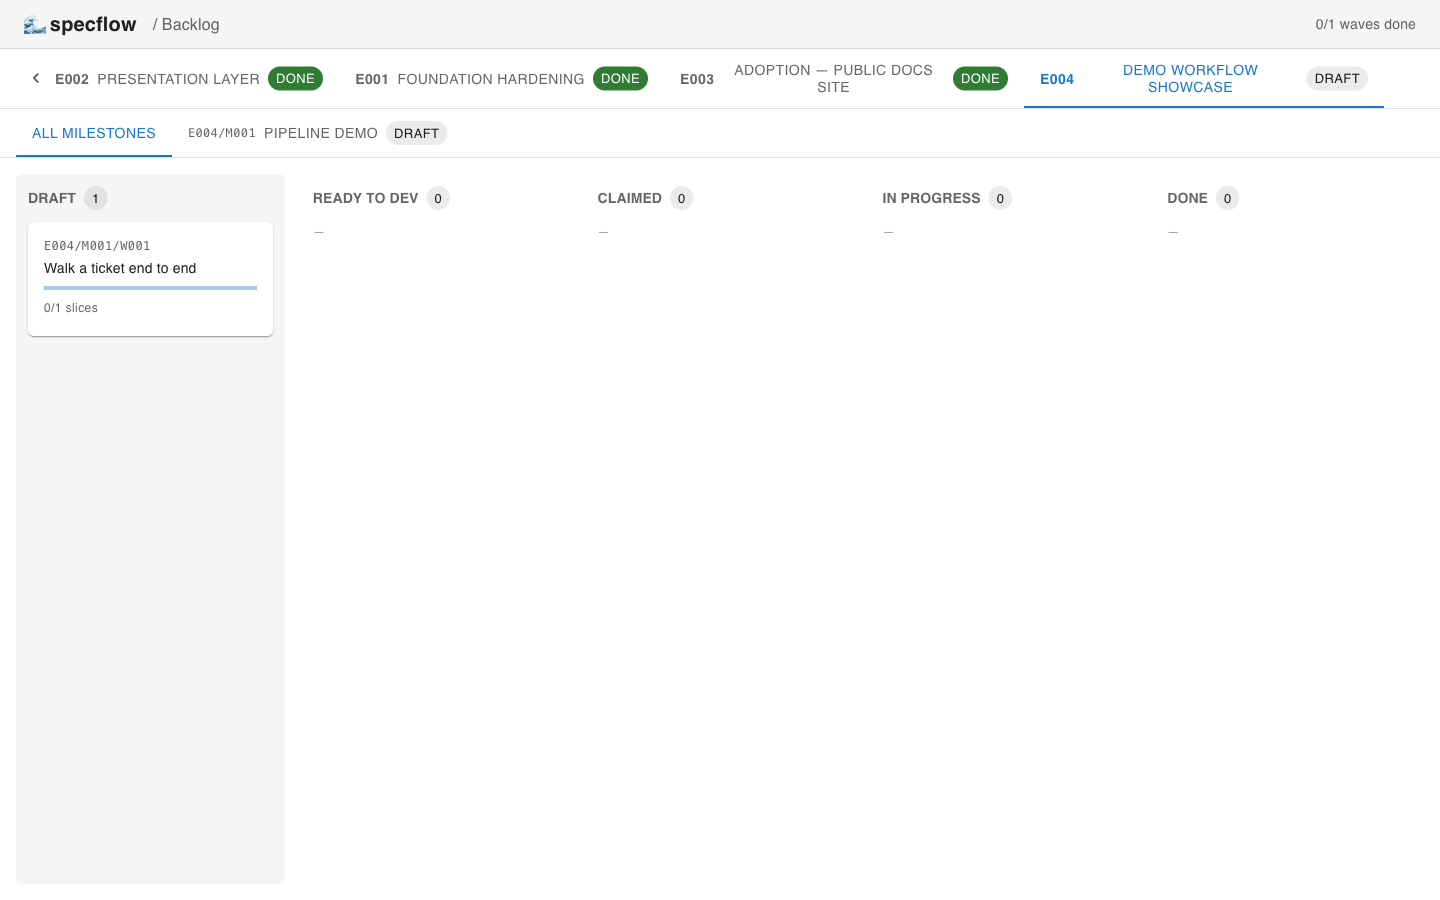
4. Author content + promote through readiness
Open the four newly-created files (epic.md, milestone.md, wave.md, slices/S001-first-slice.md) and fill in their sections. Then walk each one through the readiness checklist:
bash
npx specflow checklist E001 --promote
npx specflow checklist E001/M001 --promote
npx specflow checklist E001/M001/W001/S001 --promote
npx specflow checklist E001/M001/W001 --promote
5. Promote the wave to executable
bash
npx specflow promote E001/M001/W001
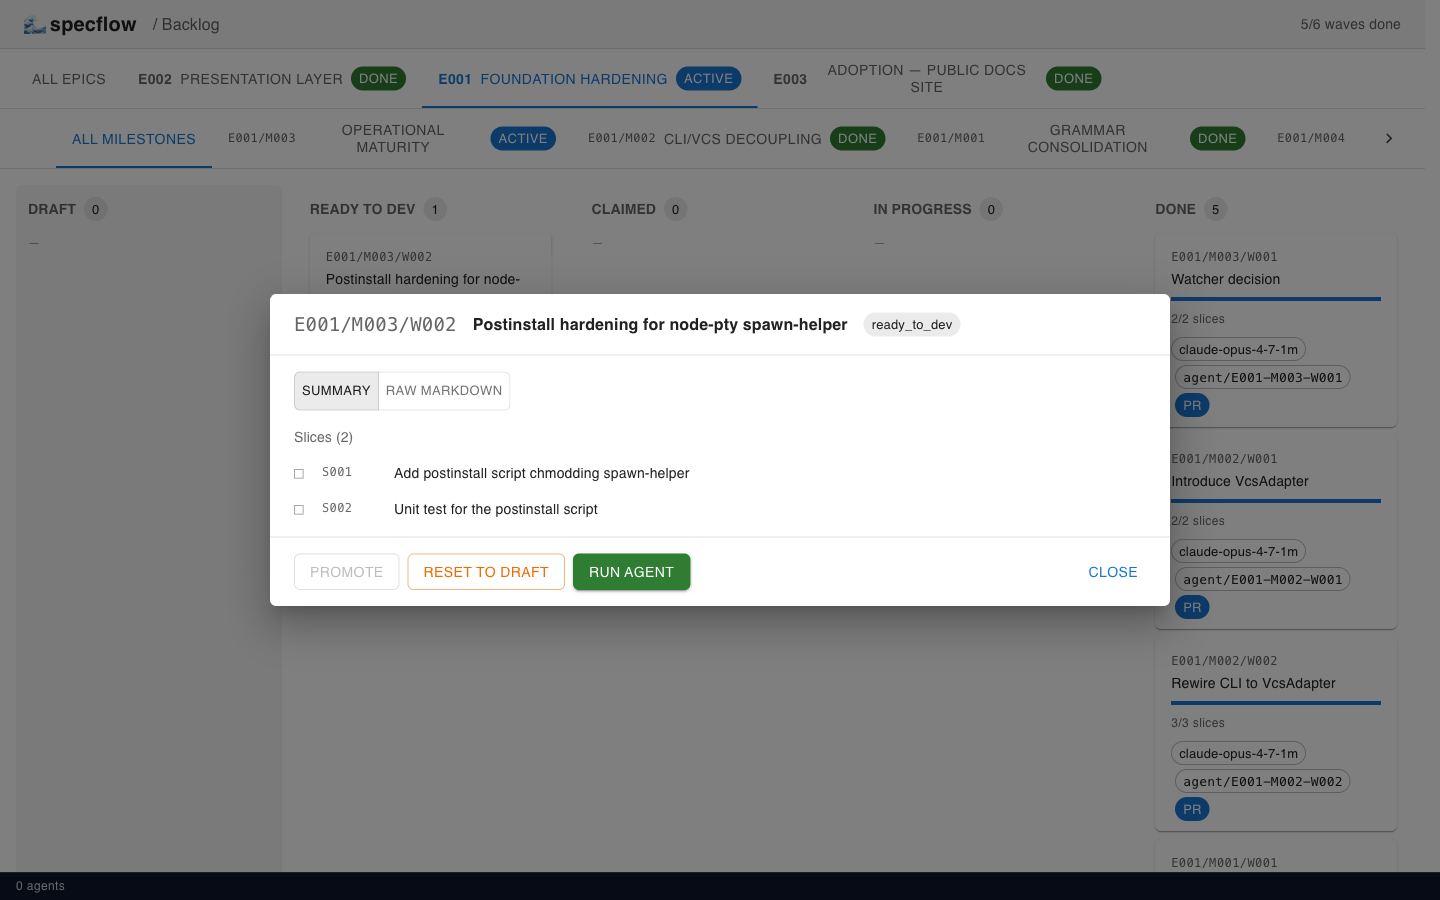
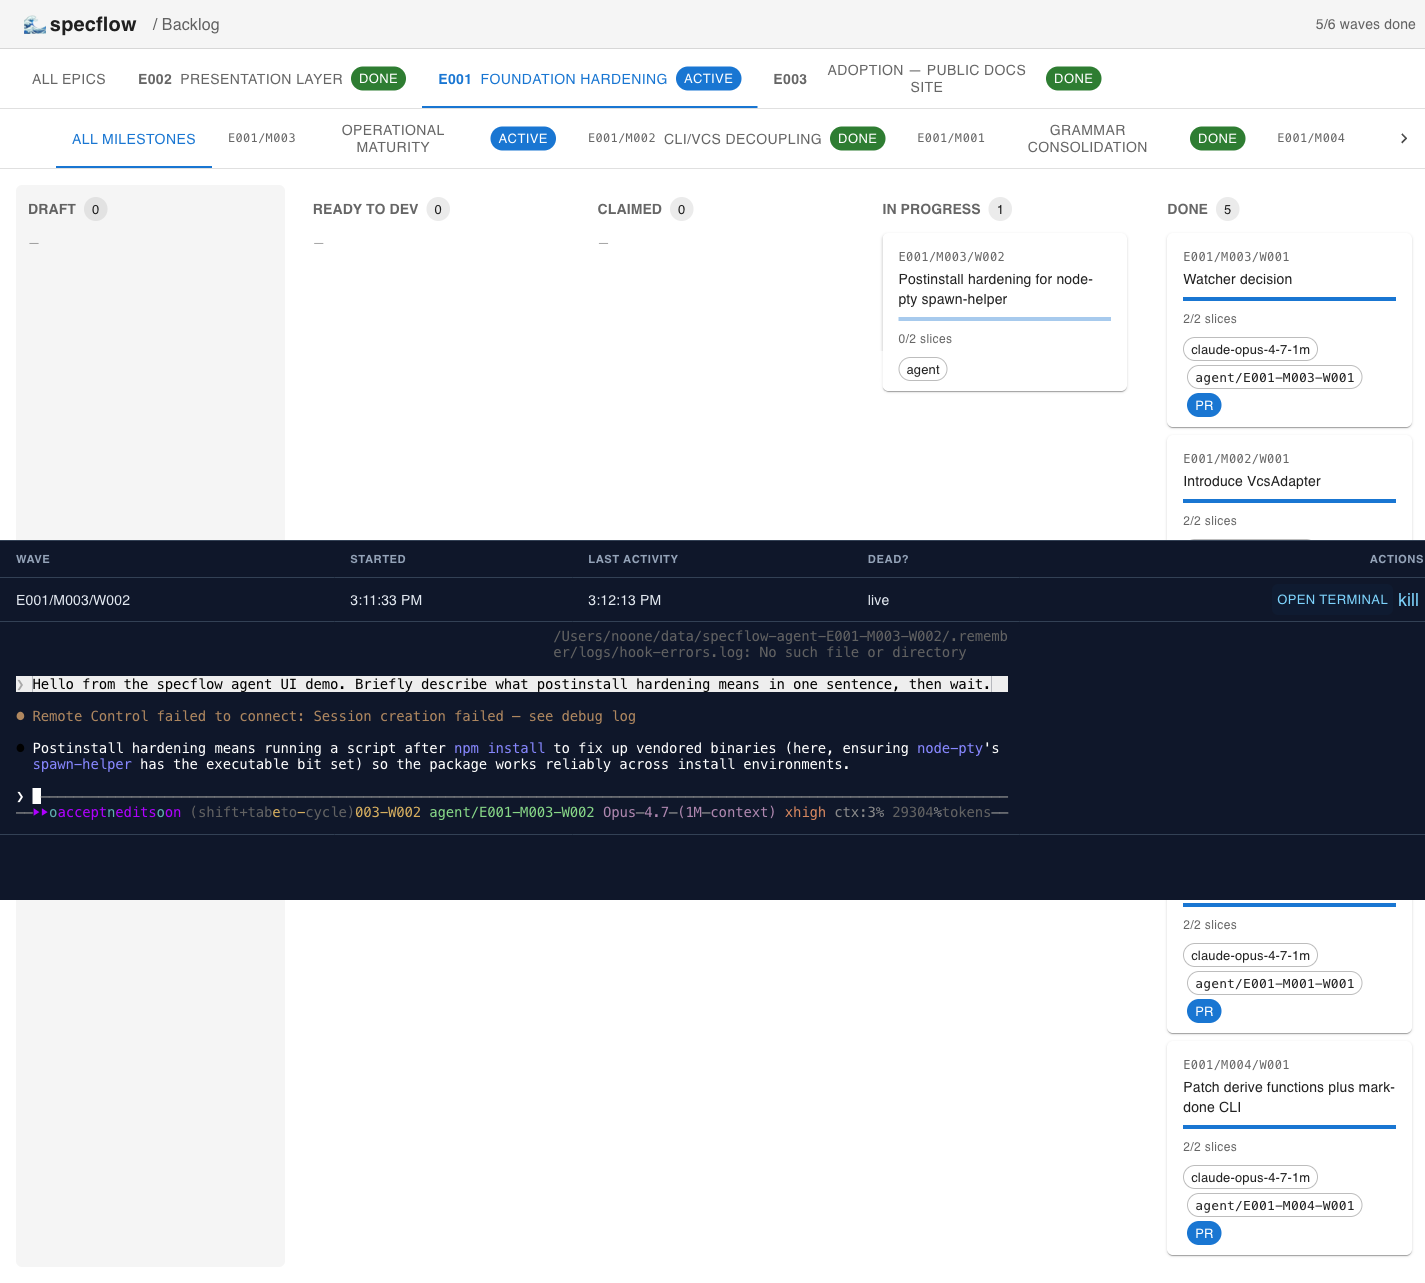
# → Wave E001/M001/W001 promoted to ready_to_devThe card moves to the ready_to_dev column and the modal exposes a green Run agent button.
6. Claim the wave + flip to in_progress
bash
npx specflow claim E001/M001/W001 me
# → Wave E001/M001/W001 claimed by me
npx specflow status E001/M001/W001 in_progress
# → Wave E001/M001/W001 status set to in_progress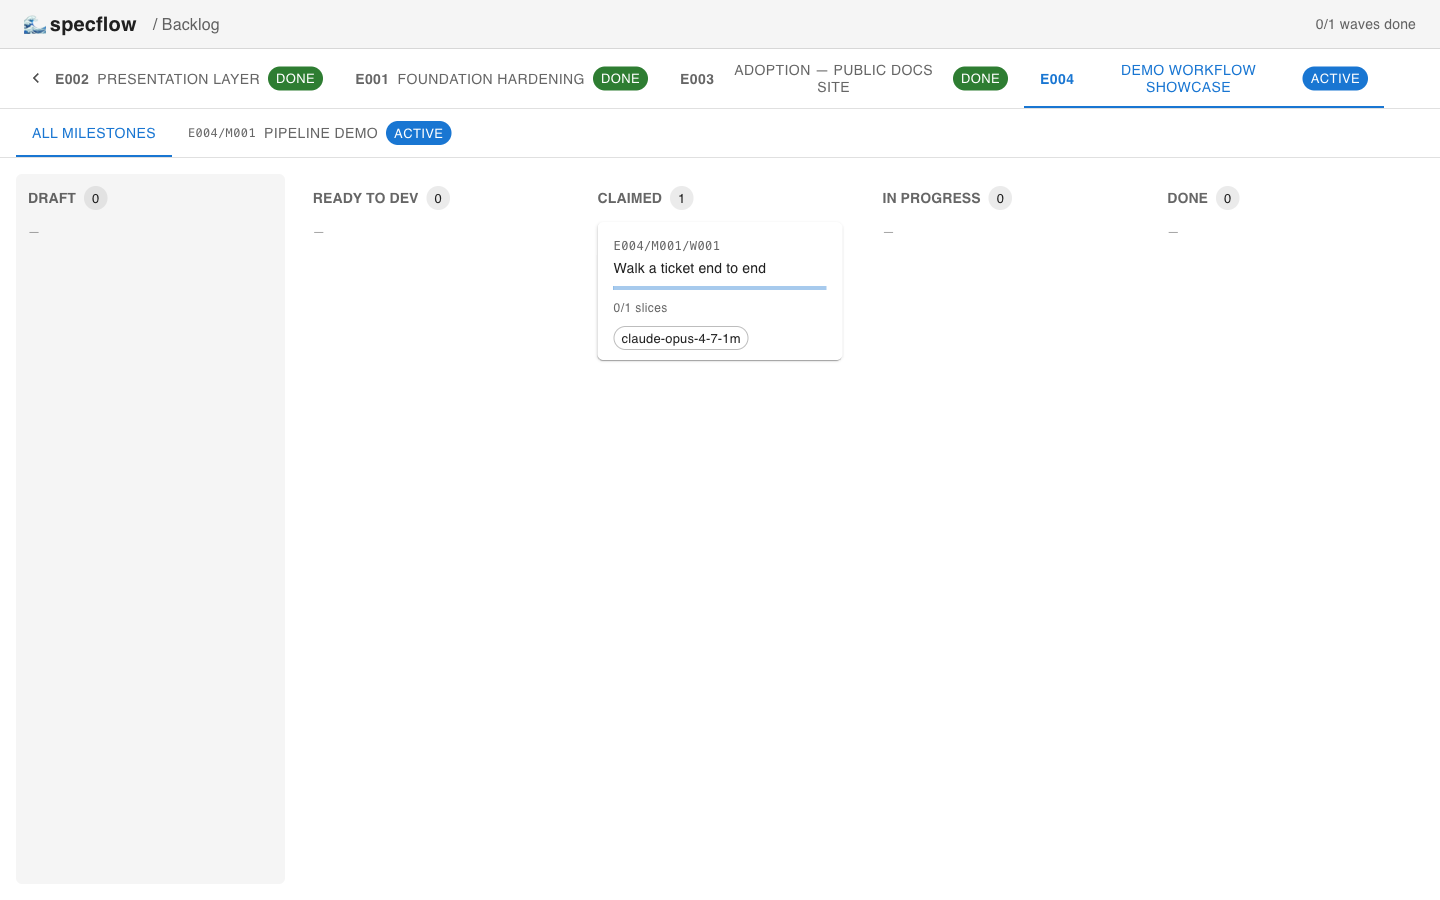
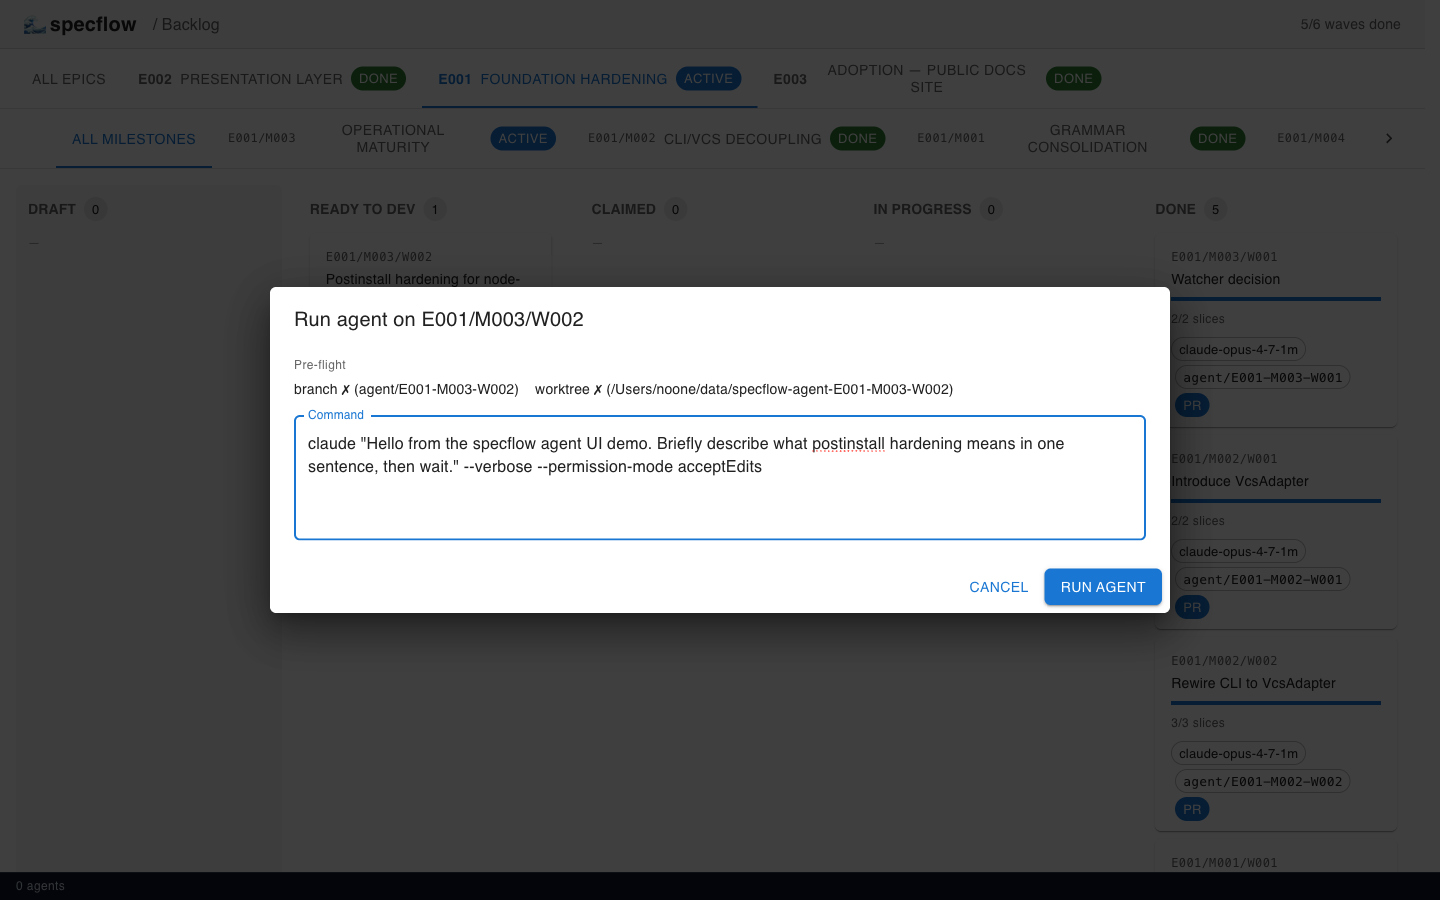
Run agent (UI)
Instead of claim + status from the CLI, click Run agent on the wave card. The CommandEditor shows pre-flight (branch/worktree status, suggested claude command), spawns the binary in a dedicated tmux session on a fresh git worktree, and pipes the pty to the browser via WebSocket.
7. Execute the slice — TDD loop
For the slice you wrote: write tests first, run them (observe RED), implement the scope, run again (observe GREEN), commit, mark slice done.
bash
# write the test file referenced in the slice's ## Test expectations
# run the slice's `Run:` command, observe RED
# implement the slice's ## Scope
# re-run the test, observe GREEN
git commit -m "[E001/M001/W001/S001] add first slice implementation"
npx specflow slice-done E001/M001/W001/S001
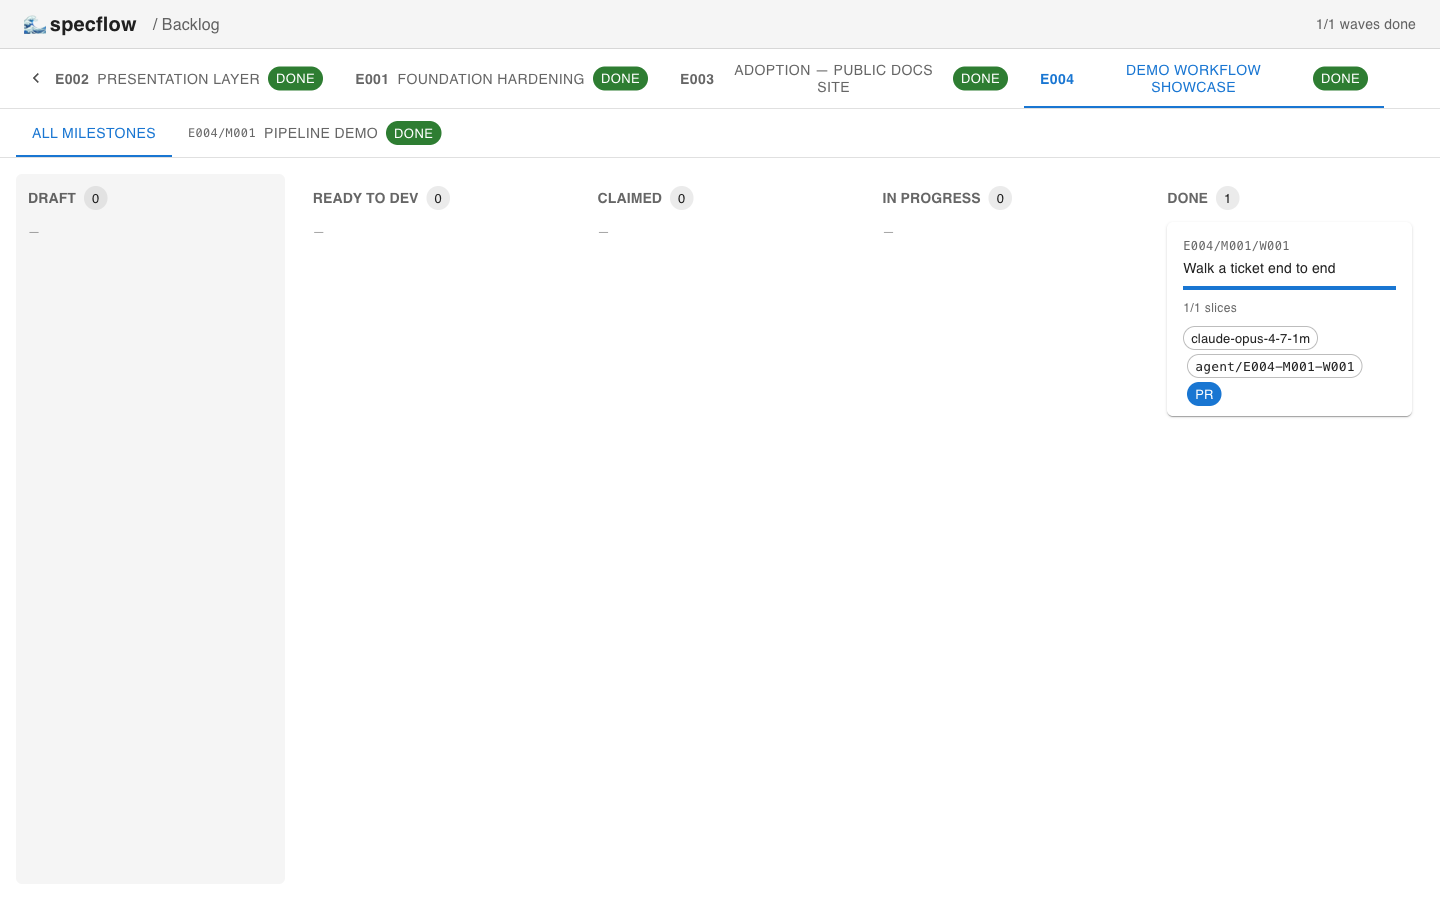
# → Slice E001/M001/W001/S001 marked done8. Finish the wave
bash
git push -u origin agent/E001-M001-W001
# open a PR titled "E001/M001/W001: First wave"
npx specflow done E001/M001/W001 --branch agent/E001-M001-W001 --pr <pr-url>
# → Wave E001/M001/W001 marked done
The card lands in the rightmost done column with the agent id, branch, and a clickable PR link:
What just happened?
You wrote one slice with strict TDD discipline, the framework enforced the readiness gates, and the result is a single PR with a per-slice commit history that a reviewer can read top-to-bottom. No Jira ticket, no design doc, no Slack thread — the slice file holds the entire decision context.